


Artist resin is a popular material used by artists to create a professional finish on their artwork. It is a two-part epoxy resin that, when mixed t ogether, creates a hard, glossy surface that is resistant to scratches and UV light. However, mixing and applying artist resin can be tricky, and if not done properly, can result in a less than desirable finish. In this essay, we will discuss how to properly mix and apply artist resin for a professional finish.
Step 1: Prepare Your Workspace
Before you begin mixing your artist resin, it is important to prepare your workspace. Make sure you are working in a well-ventilated area with plenty of space to move around. Lay down a drop cloth or newspaper to protect your work surface from any spills or drips. Wear gloves and protective eyewear to avoid any skin or eye irritation.
Step 2: Measure Your Resin
Artist resin comes in two parts: resin and hardener. It is important to measure these two parts accurately to ensure the proper chemical reaction occurs. Most artist resin kits come with measuring cups or syringes for this purpse.
Start by pouring the desired amount of resin into one of the measuring cups. Then, pour an equal amount of hardener into the second measuring cup. Be sure to measure both parts carefully and accurately.
Measuring your resin is crucial to achieving the desired results in your artwork. It is important to follow the manufacturer’s instructions carefully when measuring your resin. Most artist resins come with a recommended mixing ratio, which should be followed precisely.
To measure your resin, you will need a measuring cup or scale. If using a measuring cup, make sure it is clean and dry before use. Pour the resin into the measuring cup slowly, making sure to keep track of the amount you are adding. If using a scale, place your container on the scale and tear it to zero before adding the resin.
It is important to note that different types of artist resins may have different mixing ratios and curing times. Some may require a longer curing time than others, so it is important to read the instructions carefully before beginning your project.
When working with artist resin, it is also important to wear protective gear such as gloves and a mask to avoid inhaling any fumes or getting the resin on your skin.Measuring your artist resin accurately is an essential step in creating beautiful works of art. By following the manufacturer’s instructions carefully and taking proper safety precautions, you can achieve stunning results with this versatile material.
Step 3: Mix Your Resin
Once you have measured your resin and hardener, it is time to mix them together. Pour the hardener into the resin and stir slowly with a wooden stir stick or plastic spatula. Be sure to scrape the sides and bottom of the cup as you stir to ensure that all of the resin and hardener are mixed thoroughly.
Continue stirring for at least two minutes, making sure there are no lumps or streaks in the mixture. If you are using a larger amount of resin, you may need to mix for longer than two minutes.
Step 4: Let Your Resin Rest
After mixing your artist resin, it is important to let it rest for a few minutes before applying it to your artwork. This allows any air bubbles that may have formed during mixing to rise to the surface and pop.
Letyour mixed artist resin rest for about five minutes before moving on to the next step.
Step 5: Apply Your Resin
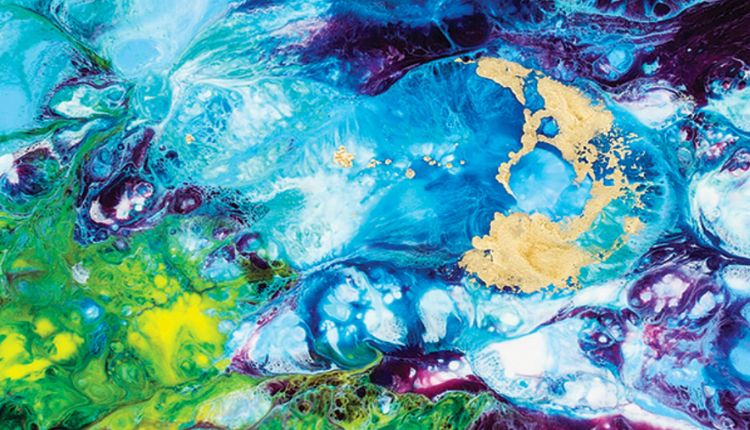
Now that your artist resin has rested, it is time to apply it to your artwork. There are several methods for applying artist resin, including pouring, brushing, and spraying.
If you are pouring your artist resin onto your artwork, start by pouring a small amount onto the center of your piece. Use a plastic spatula or spreader tool to spread the resin evenly over the surface of your artwork. Be sure not to spread it too thin or too thick – aim for an even layer about 1/8 inch thick.
If you are brushing or spraying your artist resin onto your artwork, use a soft-bristled brush or spray gun designed for use with epoxy resins. Apply an even coat over the surface of your artwork, being careful not to leave any brush marks or drips.
Step 6: Remove Air Bubbles
After applying your artist resin, you may notice small air bubbles forming on the surface of your artwork. These bubbles can be removed using several methods.
One method is to use a heat gun or torch to gently heat the surface of the resin. This will cause any air bubbles trapped within the mixture to rise to the surface and pop.
Another method is to use a toothpick or needle tool to pop any visible air bubbles on the surface of the resin. Be sure not to dig too deep into the mixture – this can cause more air bubbles to form.
Step 7: Let Your Resin Cure
After applying your artist resin and removing any air bubbles, it is important to let it cure properly before handling or moving your artwork. The curing time will vary depending on several factors such as temperature and humidity levels.
Most artist resins will cure within 24-48 hours at room temperature. However, if you live in an area with high humidity levels or low temperatures, curing time may be longer.
During this curing time, be sure not to touch or move your artwork as this can cause fingerprints or smudges on the surface of the cured resin.
In conclusion, mixing and applying artist resin requires careful attention and precision in order to achieve a professional finish on your artwork. By following these steps and taking care during each stage of the process, you can create beautiful pieces that will last for years without losing their shine or durability.